레이아웃(layout)
바로 레이아웃에 대해 알아보자. 레이아웃이란 ViewGroup의 파생 클래스로서, 포함된 View를 정렬하는 기능을 가졌다.
레이아웃의 종류
Linear Layout(리니어 레이아웃)
• 컨테이너에 포함된 뷰들을 수평 or 수직으로 일렬 배치하는 레이아웃

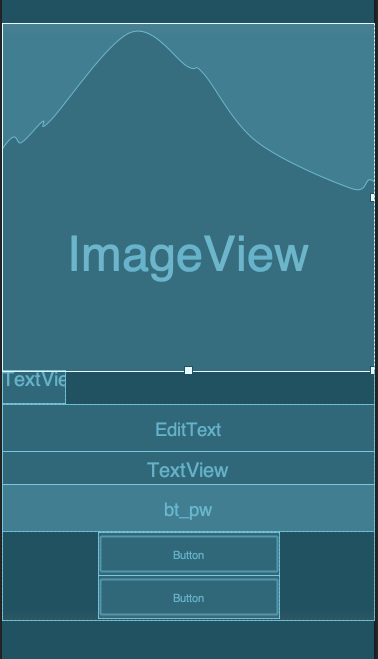
수요 속성으로는 orientation으로 배열을 어떻게 하느냐에 따라 쓸수 있고 오른쪽 그림과 같이 vertical을 사용해서 수직으로 배열한 모습이다. 리니어 레이아웃은 중첩이 되지않는다. 지정한 방향으로 쌓이는 스택형태로 표시된다.
다음으로는 Relative Layout이다.
Relative Layout
• 뷰를 서로간의 위치 관계나 컨테이너와의 위치 관계를 지정하여 배치하는 레이아웃


자식의 View위젯들이 서로간의 상대적 배치 관계에 따라 화면에 표시 될 위치가 결정되도록 만들어주는 Layout클래스이다.
그림에 예가 있다. 그리고 오른쪽 그림은 레이아웃의 속성들이며 XML을 코드로 직접 타이핑하여 레이아웃을 만들고 위치를 조정할 수 있다. 다음으로는 Frame Layout이다. 알아보자
Frame Layout
• 컨테이너 포함된 뷰들을 전부 좌상단에 배치하는 레이아웃
그러니까 프레임 레이아웃을 만들면 차곡차곡 쌓이는 느낌으로 된다고 생각하면 된다.

다음으로는 Constraint Layout이다. 알아보자
Constraint Layout
• 제약 조건을 사용해 화면을 구성한다. 복잡한 레이아웃을 계층구조를 이용해 표현하며 형제 View들과의 관계를 정의해서 레이아웃을 구성한다는 점은 RelativeLayoutrhk 비슷하지만 보다 유연하고 다양한 기능이 있다.
위의 레이아웃도 상황에 맞게 쓰이지만 Constraint Layout은 기능이 훨씬 좋고 제약 조건이 어떻게 이루어지는지만 알게 된다면 좋게 사용 할 수 있다.

이렇게 레이아웃 안에 위젯을들 나열하고 제약조건을 걸면서 구현하게 되는것이다.
• 자식 뷰 간의 상호 관계 정의 가능
• 두 View를 위아래로 붙여서 컨테이너 중앙에 배치할수 있음
• LinearLayout을 써야만 했던 뷰비율 조절도 간단히 가능
• 뷰 계층을 간단하게 할 수 있어 유지보수도 좋고 성능 또한 좋음
레이아웃 실습


이렇게 총 3개로 이루어진 레이아웃이 있다. 코드로 살펴보자
<?xml version="1.0" encoding="utf-8"?>
<LinearLayout xmlns:android="http://schemas.android.com/apk/res/android"
    xmlns:app="http://schemas.android.com/apk/res-auto"
    xmlns:tools="http://schemas.android.com/tools"
    android:layout_width="match_parent"
    android:layout_height="match_parent"
    android:background="@color/black"
    android:orientation="vertical">

    <LinearLayout
        android:layout_width="match_parent"
        android:layout_height="0dp"
        android:layout_weight="1"
        android:background="@color/puple"
        android:orientation="vertical"
        >

        <Button
            android:id="@+id/button1"
            android:layout_width="wrap_content"
            android:layout_height="wrap_content"
            android:text="Button1" />

        <Button
            android:id="@+id/button2"
            android:layout_width="wrap_content"
            android:layout_height="wrap_content"
            android:layout_gravity="center"
            android:text="Button2" />

        <Button
            android:id="@+id/button3"
            android:layout_width="wrap_content"
            android:layout_height="wrap_content"
            android:layout_gravity="right"
            android:text="Button3" />
    </LinearLayout>

    <RelativeLayout
        android:layout_width="match_parent"
        android:layout_height="0dp"
        android:layout_margin="10dp"
        android:layout_weight="1"
        android:background="@color/tell"
        >

        <Button
            android:id="@+id/button4"
            android:layout_width="wrap_content"
            android:layout_height="wrap_content"
            android:layout_marginStart="20dp"
            android:layout_marginTop="20dp"
            android:layout_marginEnd="20dp"
            android:layout_marginBottom="20dp"
            android:layout_toLeftOf="@id/button5"
            android:text="Button4" />

        <Button
            android:id="@+id/button5"
            android:layout_width="wrap_content"
            android:layout_height="wrap_content"
            android:layout_gravity="center"
            android:layout_alignParentRight="true"
            android:text="Button5" />

        <Button
            android:id="@+id/button6"
            android:layout_width="wrap_content"
            android:layout_height="wrap_content"
            android:layout_gravity="right"
            android:layout_marginLeft="10dp"
            android:layout_below="@+id/button4"
            android:text="Button6" />
    </RelativeLayout>

    <androidx.constraintlayout.widget.ConstraintLayout
        android:layout_width="match_parent"
        android:layout_height="0dp"
        android:layout_weight="1"
        android:background="@color/yellow"
        >

        <Button
            android:id="@+id/button7"
            android:layout_width="wrap_content"
            android:layout_height="wrap_content"
            android:text="Button7"
            app:layout_constraintBottom_toBottomOf="parent"
            app:layout_constraintEnd_toEndOf="parent"
            app:layout_constraintStart_toStartOf="parent"
            app:layout_constraintTop_toTopOf="parent"/>

        <Button
            android:id="@+id/button8"
            android:layout_width="wrap_content"
            android:layout_height="wrap_content"
            android:layout_gravity="center"
            android:text="Button8"
            android:layout_marginLeft="20dp"
            app:layout_constraintBottom_toBottomOf="@+id/button7"
            app:layout_constraintStart_toEndOf="@+id/button7"
            app:layout_constraintTop_toTopOf="@+id/button7"

             />

        <Button
            android:id="@+id/button9"
            android:layout_width="wrap_content"
            android:layout_height="wrap_content"
            android:layout_gravity="right"
            android:text="Button9"
            app:layout_constraintEnd_toEndOf="parent"
            app:layout_constraintStart_toStartOf="parent"
            app:layout_constraintTop_toBottomOf="@+id/button7"
             />
    </androidx.constraintlayout.widget.ConstraintLayout>


</LinearLayout>
이렇게 코드로 와 같이 보면 이해하기가 쉬울것이다. 디자인 탭에서 모든걸 가능하게 구현 할 수 있겠지만 직접 XML 코드로 타이핑하는것이 어떤 조건에서는 더 만족스러운 결과를 만들 수 있다.
이건 LinearLayout내에 3개의 LinearLaout을 추가하고 각각의 weight를 1로 사용했고 위에서 부터 Linear, Relative, Constraint 레이아웃을 사용한것이다.
마무리하며
이렇게 실습을 하고 코드를 직접 살펴보니까 레이아웃에 대한 전반적인 이해가 올라가는것 같고 역시 실습을 해야한다는걸 또 한번 느끼게 된다..